Monday, 26 October 2015

MVC5 pass DroDownList Selected Item to controller using JavaScript Async


There are many methods where you can pass the selected Item in a Dropdownlist to a controller. Most common methods are Post requests to a controller where you pass the whole forms collection.

In this module , I need to view the Account report before I fill in the form data. So I cant use a HTTP Post here because the form data is not yet ready.

Following is a very simple way of accomplish this using Ajax and JS.


 function NavigateToReport() {
            var List = document.getElementById("AgencyId");
            var id = List.options[List.selectedIndex].value;

            var url = '@Url.Action("AgentAccount", "LocalAgencyAdditions", new { id = "__id__"})';
            window.location.href = url.replace('__id__', id);
        }

Just define a new Action Method in the controller.
 
 public async Task AgentAccount(int? id)
        {

            if (id != null)
                return RedirectToAction("AgentAccount", "Report", new { agentId = id, type = 2 });

            return RedirectToAction("Index");

        }

Wednesday, 21 October 2015

CacheCow: Invalidate cache for different resource routing

CacheCow is a great tool we can use In ASP.Net WebApi projects to maintain cache with SQL Server persistence.  You can view how to implement CacheCow with SQL Server in this post.

However, there is a problem in the default implementation of invalidating cache if we have different kind of GET requests.

eg : Assume our GET request is http://myhost/api/customers. So a POST, PUT,PATCH or DELETE requests for same request http://myhost/api/customers would invalidate the cache.

But what if we have different formations of GET requests.

Eg :

GET : http://myhost/api/customers_country/SriLanka

GET : http://myhost/api/customers_city/Colombo

So any update request to  http://myhost/api/customers would not invalidate cache of  aforementioned GET requests.

Following is a very simple way of invalidate cache based on the root routing value.

I'm using hard coded sql here because this is a separate entity to my other business entities.


 public class CacheCowHackService : ICacheCowHackService
    {
        public int InvalidateEntityCache(string parentPattern)
        {
            int noOfRowDeleted;
            using (var ctx = new MyContext())
            {
                //Delete command
                noOfRowDeleted = ctx.Database.ExecuteSqlCommand(
                    $"delete from CacheState where RoutePattern LIKE '%{parentPattern}%'");

            }
            return noOfRowDeleted;
        }
    }

What all we need to do is call this method when ever there is an update to a resource.
 
public VehicleViewModel Create(VehicleViewModel model)
        {
            var id = Guid.NewGuid();
            model.Id = id;

            using (var transactionScope = new TransactionScope())
            {
                ......
                var entity = VehicleMap.ModelToEntity(model);
               ....
                _vehicleService.Add(entity);
                entity = _vehicleService.GetSingle(x => x.Id == id);
                model = VehicleMap.EntityToModel(entity);
                CacheCowHack.InvalidateEntityCache(Const.VehicleRoute);
                transactionScope.Complete();
                return model;
            }
        }


Tuesday, 20 October 2015

WebApi Cache using CacheCow and SQL Server persistancy

I wrote how to implement in-memory cache in this post. But this solution is not good if we want to host our Api in a web farm or if we are going to use load balancing. The best approach is using DB persistence to hold the cache.

Fortunately, CacheCow gives us the SQL Server implementation. Following are the configurations we need to made in order to activate this.
Refer following NuGet into your project.

Install-Package CacheCow.Server.EntityTagStore.SqlServer

In the WebApiConfig.cs file add the following code.
 
 var connString = System.Configuration.ConfigurationManager.ConnectionStrings["Your_Conn_Str"].ConnectionString;
 var eTagStore = new SqlServerEntityTagStore(connString);  
 var cacheCowCacheHandler = new CachingHandler(config,eTagStore); 
 cacheCowCacheHandler.AddLastModifiedHeader = false;
 config.MessageHandlers.Add(cacheCowCacheHandler);

Now this code would not run as it is. Because we need to do required changes to the DB as well. The required sql scripts are getting download along with the NuGet package. Execute that script against your DB. It would create a table CacheState and other relevant procedures.

Now the CacheCow DB persistence is done.Lets shoot some Web API and requests and test results.

When we are doing our initial Get request to a WebApi resource, the fiddler looks like as follows. Check the  request and response headers .


you can clearly see that its responded with status 200 - Ok. Following is the status of the CacheState now.

You can clearly see that the ETag is created and saved in the DB.
If we are going to do the same GET request again, we would get the 304 from server.

You can clearly see that the request been made to the server with the ETag If-None-Match. Server get the ETag and responded with 304 Not Modified. So no need to get the resource back again. ie: Client has the latest version.

Monday, 19 October 2015

Caching the WEBApi REST calls using CacheCow - In memory

Caching is a very important aspect when we are designing  a RESTfull web APIs. The main advantage is we do not need to send the same resource over and over again if the content is not updated.

Traditional way of doing the caching is using ETags and maintain these ETags manually in both server and client end. ETag(Entity Tag) is the property which client validates against each request to a resource. Client sends the  request with the If-None-Match: "ETag#". If the ETag not updated , the server returns the 304 - Not Modified . ie : Client has the latest version of the resource requested.

Installing and configuring the Cachecow is simple. All we need to do it install the nuget package to the WebApi project.

Install-Package CacheCow.Server -Version 0.4.12

Add the following code to the WebApiConfig.cs file.
 
var cacheCowCacheHandler = new CacheCow.Server.CachingHandler();
config.MessageHandlers.Add(cacheCowCacheHandler);

This would create an in-memory cache for requested resources (Weak resources which consist the 'W/' prefix in the ETag ). This is Ok for a single server application where there are no any load balances or web farms. I will tell you how to configure persistence caching using CacheCow in my next post.

Thursday, 15 October 2015

WebAPI Data call with Pagination

Most of the time when we are calling for a data API call, we fetch all records and do the pagination in the client side. But this hinders the network performance and lead to a heavy unnecessary data fetch. Hence , it is better to do the pagination in the server side and return only required data to the client.

Following code demonstrates an easy way to achieve this.

1. The WebAPI controller code
 
[HttpGet, Route("ByClient/{clientID:int}")]
public IHttpActionResult GetByClient(int clientID, int pageSize=5, int page=1 ,string sort= "id")
{
      try
      {
          object header;
          var receivedModel = VehicleProvider.GetByClient(clientID, pageSize , page,  sort, out header);

          HttpContext.Current.Response.Headers.Add("Pagination",
              Newtonsoft.Json.JsonConvert.SerializeObject(header));

          IHttpActionResult response = Ok(receivedModel);
          return response;
     }
     catch (Exception)
     {
          return InternalServerError();
     }
           
}

The actual pagination is going inside the BL's GetByClient method. In this code we are adding a response header attribute as "Pagination". This information is useful to client in order to determine the current data location and the total size.
2. The BL Code
 
public IQueryable GetByClient(int clientID, int pageSize, int page, string sort, out object header)
        {
            var totalCount = _vehicleService.Count();
            var totalPages = (int)Math.Ceiling((double)totalCount / pageSize);


            var paginationHeader = new
            {
                currentPage = page,
                pageSize = pageSize,
                totalCount = totalCount,
                totalPages = totalPages
            };

            header = paginationHeader;

            var results = VehicleMap.EntityToModelQueryble( _vehicleService.GetAll(r => r.ClientId == clientID));
            return results.ApplySort(sort).Skip(pageSize*(page - 1))
                .Take(pageSize);
        }

In this code , we are creating a new object to pass as the header.

Wednesday, 14 October 2015

Dynamic Sorting for WebAPI Get method

We can sort results which returns from a WebAPI Get method using Linq Dynamics as follows.

First of all we need to create an extension method for IQueryable<T>. This method would perform required sorting. Following is the code.


public static class IQueryableExtensions
    {
        public static IQueryable<T> ApplySort<T>(this IQueryable<T> source, string sort)
        {
            if (source == null)
            {
                throw new ArgumentNullException("source");
            }

            if (sort == null)
            {
                return source;
            }

           var lstSort = sort.Split(',');

      
            string completeSortExpression = "";
            foreach (var sortOption in lstSort)
            {
           
                if (sortOption.StartsWith("-"))
                {
                    completeSortExpression = completeSortExpression + sortOption.Remove(0, 1) + " descending,";
                }
                else
                {
                    completeSortExpression = completeSortExpression + sortOption + ",";
                }

            }

            if (!string.IsNullOrWhiteSpace(completeSortExpression))
            {
                source = source.OrderBy(completeSortExpression.Remove(completeSortExpression.Count() - 1));
            }

            return source;
        }
    }


We have hard coded the separator and treat the - sign as the descending sorter. source.OrderBy is using the linq dynamics OrderBy method.
Application of the sorting can be done as follows.

 
[HttpGet, Route("ByClient/{clientID:int}")]
public IHttpActionResult GetByClient(int clientID,string sort="id")
{
     try
      {
          var receivedModel = VehicleProvider.GetByClient(clientID);
          IHttpActionResult response = Ok(receivedModel.ApplySort(sort));
          return response;
      }
      catch (Exception)
      {
          return InternalServerError();
      }
     
}


The VehicleProvider.GetByClient method should return an IQueryable<T>. All we need to do is plug the ApplySort method with sort parameters to the result.

[Solved] : HTTP 405 - Method Not Allowed from WebAPI DELETE request

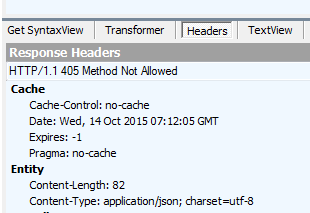
The IIS would return the 405 Error sometimes when we send a DELETE request. This happens mainly because of following two reasons.


  1. The Routing attributes are not matched 
  2. Incorrect web.config where we do not allow DELETE request. 
The first cause is easy to solve. Make sure your routing name s correct and your attributes are also correct. Eg : If the passing id attribute is a guid and if we pass an int , it throws 405.

 
If your Delete method looks like this , make sure you are passing a correct Guid value.

If you having a config issue, make sure that you are having following settings in the web.config correctly.


 <system.webServer>
    <modules runAllManagedModulesForAllRequests="true">
       <remove name="FormsAuthentication" />
      <remove name="WebDAVModule"/>
    </modules>
     <httpProtocol>
    <customHeaders>
        <add name="Access-Control-Allow-Origin" value="*" />
        <add name="Access-Control-Allow-Headers" value="Content-Type" />
        <add name="Access-Control-Allow-Methods" value="GET, POST, PUT, DELETE, OPTIONS" />
    </customHeaders>
    </httpProtocol>
    <handlers>
      <remove name="ExtensionlessUrlHandler-Integrated-4.0" />
      <remove name="OPTIONSVerbHandler" />
      <remove name="TRACEVerbHandler" />
      <add name="ExtensionlessUrlHandler-Integrated-4.0" path="*." verb="*" type="System.Web.Handlers.TransferRequestHandler" preCondition="integratedMode,runtimeVersionv4.0" />
      <remove name="ExtensionlessUrlHandler-ISAPI-4.0_32bit" />
      <remove name="ExtensionlessUrlHandler-ISAPI-4.0_64bit" />
      <remove name="ExtensionlessUrlHandler-Integrated-4.0" />
      <add name="ExtensionlessUrlHandler-ISAPI-4.0_32bit" path="*." verb="GET,HEAD,POST,DEBUG,PUT,DELETE,PATCH,OPTIONS" modules="IsapiModule" scriptProcessor="%windir%\Microsoft.NET\Framework\v4.0.30319\aspnet_isapi.dll" preCondition="classicMode,runtimeVersionv4.0,bitness32" responseBufferLimit="0" />
      <add name="ExtensionlessUrlHandler-ISAPI-4.0_64bit" path="*." verb="GET,HEAD,POST,DEBUG,PUT,DELETE,PATCH,OPTIONS" modules="IsapiModule" scriptProcessor="%windir%\Microsoft.NET\Framework64\v4.0.30319\aspnet_isapi.dll" preCondition="classicMode,runtimeVersionv4.0,bitness64" responseBufferLimit="0" />
      <add name="ExtensionlessUrlHandler-Integrated-4.0" path="*." verb="GET,HEAD,POST,DEBUG,PUT,DELETE,PATCH,OPTIONS" type="System.Web.Handlers.TransferRequestHandler" preCondition="integratedMode,runtimeVersionv4.0" />
      
  </handlers>
  </system.webServer>

Tuesday, 13 October 2015

Format WebAPI browser requests to Camel casing Json documents

If we send a GET request to WebAPI , by default it is returning a XML document. The reason is given in this post.
It is nice if we can format the browser output nicely with camel casing, proper intending etc. Then the client can discover the output easily. All we need to do it add the following formatting code to the WebApiConfig class.
 
 public static class WebApiConfig
    {
        public static void Register(HttpConfiguration config)
        {
           
            config.SuppressDefaultHostAuthentication();
            config.Filters.Add(new HostAuthenticationFilter(OAuthDefaults.AuthenticationType));

            // Web API routes
            config.MapHttpAttributeRoutes();

            config.Routes.MapHttpRoute(
                name: "DefaultApi",
                routeTemplate: "api/{controller}/{id}",
                defaults: new { id = RouteParameter.Optional }
            );

            config.Formatters.XmlFormatter.SupportedMediaTypes.Clear();


            config.Formatters.JsonFormatter.SerializerSettings.Formatting
                = Newtonsoft.Json.Formatting.Indented;

            config.Formatters.JsonFormatter.SerializerSettings.ContractResolver
                = new CamelCasePropertyNamesContractResolver();
        }
    }

The result is more user friendly output as follows.

Monday, 12 October 2015

Load multiple assemblies for MVC WEBAPI based N-tier MEF IOC Application

Microsoft Extended Framework can be used as a IOC and following is the simplest implementation we can have for a simple project.


[Import]
string message;

public class DisplayMessageBox
{
    [Export()]
    public string MyMessage
    {
        get { return "This is my example message."; }
    }
}

private void Compose()
{
    AssemblyCatalog catalog = new AssemblyCatalog(System.Reflection.Assembly.GetExecutingAssembly());
    CompositionContainer container = new CompositionContainer(catalog);
    container.SatisfyImportsOnce(this);
}

void Run()
{
    Compose();
    Console.WriteLine(message);
    Console.ReadKey();
}


The most important part is the compose method where it loads the assembly which is exporting the MyMessage property. This is working properly because there is only one assembly to load.
But how we can accomplish this when there are multiple projects in our solution and there are many assemblies to load to the catalog ? Following is a simple example of how we can load multiple assemblies from multiple projects. Im using a web api application to demonstrate this.
Solution's project layout

Our main project in this layout is the WebApi project. Hence, we need to initiate the MEF inside that project. But the problem is we have many reference assemblies. First of all, we need to configure post build properties of required projects as follows. This would copy the binaries to main project upon successful build.

copy "$(TargetFileName)" "$(SolutionDir)$(SolutionName)\bin"

We need to add following to the WebApi's startup class to initiate the MEF process.
 
 public void Configuration(IAppBuilder app)
        {
            ConfigureAuth(app);
            MefConfig.RegisterMef();
        }

Following is the MefConfig class.
In here we are loading required assemblies by name and iterating each and load them to the container.

 
 public static class MefConfig
    {
        public static CompositionContainer Container { get; private set; }
        public static void RegisterMef()
        {
            var files = Directory.GetFiles(AppDomain.CurrentDomain.BaseDirectory, "VTracker*.dll", SearchOption.AllDirectories)
                .Where(o => !o.Replace(AppDomain.CurrentDomain.BaseDirectory, "").Contains(@"obj\"));

            var catalogAggregator = new AggregateCatalog();

            foreach (var file in files)
            {
                catalogAggregator.Catalogs.Add(new AssemblyCatalog(Assembly.LoadFrom(file)));
            }

            Container = new CompositionContainer(catalogAggregator);
            var resolver = new MefDependencyResolver(Container);
            // Install MEF dependency resolver for MVC
            DependencyResolver.SetResolver(resolver);
            // Install MEF dependency resolver for Web API
            System.Web.Http.GlobalConfiguration.Configuration.DependencyResolver = resolver;
        }

    }

Tuesday, 6 October 2015

.Net Statement Lambda expressions and Expression Lambda expressions

Lambda expressions are two fold as Statement and Expression and they are got differ slightly b how we using curly braces in the code.

ie : If we are using the curly braces then it becomes a Statement lambda and vise versa.

Following is a small example to illustrate this. 


List<string> namesList = new List<string>();
IQueryable<string> query = namesList.AsQueryable();
namesList.Add("Priyal");
namesList.Add("Kasun");
namesList.Add("Praneeth");
namesList.Add("Primal");

string endsWithL1 = namesList.First(x => x.EndsWith("l"));
string endsWithL2= query.First(x => x.EndsWith("l"));
// endsWithL1 and endsWithL2 are now both 'two' as expected 
var foo1 = namesList.First(x => { return x.EndsWith("n"); }); //no error 
var   foo2 = query.First(x => { return x.EndsWith("n"); }); //error 
var  bar2 = query.First((Func<string, bool>)(x => { return x.EndsWith("n"); })); //no error 

Note that List.First expects a delegate and the IQueryable.First expects an expression.
This is why the foo1 gives a compile time error because we used curly braces and the it becomes a lambda statement. But we can can force the lambda to evaluate to a delegate as we did for the bar2.

Tuesday, 29 September 2015

VS 2015 : Designer.cs not showing up for the .resx file

By default , the designer file for the .resx files are not turned up in the solution. In order to show them we need to right click on the resx file and "Run Custom Tool".


Then you can see the designer related files as follows.


Saturday, 26 September 2015

MVC5 jquery client side unique validation - onblur

I have described how to do client side validation using data annotations using remote attribute in one of my previous posts. This post is about how to use pure jquery with Ajax to do unique validation in a MVC5 web app.

1. First of all, we need to implement a public method in our controller.


[HttpPost]
public JsonResult IsPassportExists(string passportNumber)
{
     return Json(db.Clients.Any(x => x.PassportNumber == passportNumber), JsonRequestBehavior.AllowGet);
}

This would do the server side query and do the validation. Note that we are going to return a JsonResult in order to support client side Ajax call.

2. Client side function to perform the server call.
 
 function CheckValue(ctrl) {
            $.ajax({
                url: '@Url.Action("IsPassportExists", "Client")',
                type: 'POST',
                dataType: 'json',
                cache: false,
                data: { 'passportNumber': ctrl.value },
                success: function (value) {
                    if (value) {
                        ctrl.style.backgroundColor = "red";
                        alert('Passport Number already exist!');
                        
                    } else {
                        ctrl.style.backgroundColor = "white";
                    }
                },
                error: function () {
                    alert('Error occured');
                }
            });
        }

We are passing the client controller (ie: textbox) to the function and do the background color change according to the validation result.

3. Finally , following is the way we can call to this function in the textbox
 
 @Html.TextBoxFor(m => m.PassportNumber, new {@class = "form-control", data_bind = "value: PassportNumber", maxlength = "20", onblur = "CheckValue(this)"})

Friday, 25 September 2015

Add a non Database field to the Model using Data Annotations

Sometime we may need to add a new column to our model but do not want to reflect that in the database. Especially in the code first development , we do not want to migrate that particular field to the database.

One way of achieving this is using a ViewModel. For some reason, if we really want to add this our Model class we can easily use the NotMapped Data annotation attribute as follows. Most of the time this could be a calculated column.

 
[NotMapped]
public decimal AccountBalance{get;set;}


Thursday, 24 September 2015

MVC5 Client side validation using REMOTE Data annotation

More often we need to do client side validation before we submit the view to the controller. Most of the time , we are using jquery or ajax calls to achieve this objective.

But there is much easier way of achieving this using the remote data annotation in our model class. What it is performing is, invoke an async call to the controller to perform required task.

Following are code samples for this.

1. We need to add following method to the controller which returns JsonResult
 
[HttpPost]
public JsonResult IsPassportExists(string PassportNumber)
{
    return Json(db.Clients.Any(x => x.PassportNumber == PassportNumber), JsonRequestBehavior.AllowGet);
}

2. Following is the corresponding model attribute. Note we are referring the controller's method in this.
 
 [Required]
 [Display(Name = "Passport Number")]
 [StringLength(20)]
 [Remote("IsPassportExists", "Client", HttpMethod = "POST", ErrorMessage = "Passport Number already registered")]
 public string PassportNumber { get; set; }

3. In the View, you just need to refer following js libraries.
 
<script src="~/Scripts/jquery.validate.unobtrusive.js"></script>
<script src="~/Scripts/jquery.validate.unobtrusive.min.js"></script>

Tuesday, 22 September 2015

Web API 2 : Convert default xml media type to json

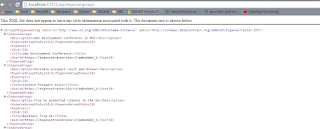
Even if we specify a Web API call to return a json type, when we navigate tothe api call usign a browser, it returns an xml formatted data.

 
             var expenseGroups = _repository.GetExpenseGroups();

             return Ok(expenseGroups.ToList()
                    .Select(eg => _expenseGroupFactory.CreateExpenseGroup(eg)));

But we would get a result something as follows in the browser.

This happens because the browser request for the text/html type in its request header
Example browser request header
text/html,application/xhtml+xml,application/xml;q=0.9,image/webp,*/*;q=0.8
We can program our API in way that , if browser request for a text format the request to json.
Following is the formatting code we need to get done in the WebApiConfig
 
             var expenseGroups = _repository.GetExpenseGroups();

             return Ok(expenseGroups.ToList()
                    .Select(eg =gt; _expenseGroupFactory.CreateExpenseGroup(eg)));

We can get the following result.

Monday, 21 September 2015

[Solved] : There is already an open DataReader associated with this Command which must be closed first.

The exception "There is already an open DataReader associated with this Command which must be closed first." occurs when you try to perform another read while there is an ongoing read. Most commonly when you are iterating through one result set and within the loop the you are trying to fetch another data set.

Following is a typical example for this.
 
             var res = GetPayrollforReport(month, year);            

            foreach (var payRoll in res)
            {
                PayrollViewModel pay = new PayrollViewModel();
                pay.PayRollId = payRoll.PayRollId;
                var emp = db.Employees.FirstOrDefault(e => e.EmployeeId == payRoll.EmployeeId);
            }

In here, its trying to fetch employee details inside the payroll loop. So this is leading to above exception. There are two solutions for this.
1. Caste the first fetch in to a proper list type.
 
             var res = GetPayrollforReport(month, year).ToList<PayRoll>();            

            foreach (var payRoll in res)
            {
                PayrollViewModel pay = new PayrollViewModel();
                pay.PayRollId = payRoll.PayRollId;
                var emp = db.Employees.FirstOrDefault(e => e.EmployeeId == payRoll.EmployeeId);
            }

2. Allowing MARS in your connection string. This can be easily fix by introducing the MultipleActiveResultSets=true param into your connection string.

Monday, 14 September 2015

Customizing the google map and populating locations from Database using WEB API2 .Net

Following is a brief tutorial of how you can customize the default google map ( I have used the JS API) and populating geo locations from a Database.

There are many good tutorials where you can dynamically plot geo locations using a database table. Most of them are PHP based. For ASP and .Net fans, following is a very naive way of accomplish the same result.

We are going to use a WEB API2 Rest service to fetch data in to our map front end. You can see how easily we can built a Code first WEB API using SQL server in this link.

Following is my model class. It is very simple and contains only geo location data.

 
public class MapIcons
    {
        [Key]
        public Guid Id { get; set; }

        public double Latitude { get; set; }

        public double Longitude { get; set; }

        [StringLength(50)]
        public string Name { get; set; }

        [StringLength(50)]
        public string Caption { get; set; }

        public int CapSize { get; set; }

        [StringLength(50)]
        public string Icon { get; set; }
    
    }

Following is the context class
 
 public partial class MapDataContext : DbContext
    {
        public MapDataContext()
            : base("name=DBContext")
        {
        }


        protected override void OnModelCreating(DbModelBuilder modelBuilder)
        {
        }

        public DbSet<MapXyIcons> MapIcons { get; set; }
    }

Updated configuration class to populate some initial data.
 
internal sealed class Configuration : DbMigrationsConfiguration
    {
        public Configuration()
        {
            AutomaticMigrationsEnabled = false;
        }

        protected override void Seed(GoogleMapService.Models.MapDataContext context)
        {


            context.MapXyIcons.AddOrUpdate(m => m.Id,
                new Models.MapXyIcons
                {
                    Id = Guid.NewGuid(),
                    Name = "TestXy1",
                    Caption = "Test Xy 1 ",
                    Icon = "light",
                    Latitude = 6.9025191,
                    Longitude = 79.8596352,
                    CapSize = 10
                },
                new Models.MapXyIcons
                {
                    Id = Guid.NewGuid(),
                    Name = "TestXy2",
                    Caption = "Test Xy 2 ",
                    Icon = "poly",
                    Latitude = 6.9023642,
                    Longitude = 79.861076,
                    CapSize = 10
                },
                new Models.MapXyIcons
                {
                    Id = Guid.NewGuid(),
                    Name = "TestXy2",
                    Caption = "Test Xy 2 ",
                    Icon = "poly",
                    Latitude = 6.9019559,
                    Longitude = 79.8612179,
                    CapSize = 10
                },
                new Models.MapXyIcons
                {
                    Id = Guid.NewGuid(),
                    Name = "TestXy3",
                    Caption = "Test Xy 3 ",
                    Icon = "light",
                    Latitude = 6.9019559,
                    Longitude = 79.8612179,
                    CapSize = 10
                },
                new Models.MapXyIcons
                {
                    Id = Guid.NewGuid(),
                    Name = "TestXy4",
                    Caption = "Test Xy 4 ",
                    Icon = "Light",
                    Latitude = 6.9021217,
                    Longitude = 79.8617325,
                    CapSize = 10
                }
                );

        }
    }

The Web API controller goes as follows.
 
 [RoutePrefix("Icons")]
    public class MapIconController : ApiController
    {
        private MapDataContext db = new MapDataContext();

        // GET api/MapIcon
        [HttpGet, Route("GetAll")]
        [HttpHeaderAttribute("Access-Control-Allow-Origin", "*")]
        public IHttpActionResult GetMapIcons()
        {
            return Ok(db.MapIcons.ToListAsync());
        }

        // GET api/MapIcon/5
        [ResponseType(typeof(MapIcons))]
        public async Task<IHttpActionResult> GetMapIcons(Guid id)
        {
            MapIcons mapicons = await db.MapIcons.FindAsync(id);
            if (mapxyicons == null)
            {
                return NotFound();
            }

            return Ok(mapicons);
        }
     }

Note that I'm returning a Json response to the client with Map data. This would make the client implementation easy and independent.
[HttpHeaderAttribute("Access-Control-Allow-Origin", "*")] : This attribute make your life easier when testing the applications in the development environment itself. Otherwise you need to install a CORS plugin in your browser and allow cross origin.
The server side code is done now and we need to concentrate on the client side implementation. I did a customization to the google default map and You can easily learn this using google tutorial itself.
You can access the service api as in following jquery code.
 

            function ajax(url) {
                return new Promise(function (resolve, reject) {
                    var xhr = new XMLHttpRequest();
                    xhr.onload = function () {
                        resolve(this.responseText);
                    };
                    xhr.onerror = reject;
                    xhr.open('GET', url);
                    xhr.send();
                });
            }

            ajax("http://localhost:1210/Icons/GetAll").then(function (result) {
                mapJson = result;

                var mapObj = JSON.parse(mapJson);
            };

Note that I have used promises to implement this in order to support Async server side calls.
Finally, we need to iterate thorough the data set and plot icons based on their locations.
 
   var features = [];

                for (var i = 0; i < mapObj.Result.length; i++) {

                    var pos = new google.maps.LatLng(mapObj.Result[i].Latitude, mapObj.Result[i].Longitude);

                    var feature = {
                        position: pos,
                        type: mapObj.Result[i].Icon
                    };

                    features.push(feature);

                    var mapLabel = new MapLabel({
                        text: mapObj.Result[i].Caption,
                        position: pos,
                        map: map,
                        minZoom: 10,
                        maxZoom: 25,
                        strokeColor: '#ffff7f',
                        strokeWeight: 20,
                        fontColor: '#ff0000',
                        fontSize: mapObj.Result[i].CapSize,
                        align: 'center'
                    });
                }

                for (var i = 0, feature; feature = features[i]; i++) {
                    addMarker(feature);
                }

                function addMarker(feature) {
                    var marker = new google.maps.Marker({
                        position: feature.position,
                        icon: icons[feature.type].icon,
                        map: map
                    });
                }


Additionally , I have added a small legend based on the icon types.
 
 var legend = document.getElementById('legend');

                for (var key in icons) {
                    var type = icons[key];
                    var name = type.name;
                    var icon = type.icon;
                    var div = document.createElement('div');
                    div.innerHTML = '<img src="' + icon + '"> ' + name;
                    legend.appendChild(div);
                }


Following is a screen of the output of this application.

You can download the full source code from this location.

Saturday, 12 September 2015

Correct HTTP status codes for web APIs

Most of the time, when we are designing a web API, we do not consider much what status codes to return. Some codes are returning to the client  by default by the API but it is essential that we control what codes that get returned to the client.

This is essential when we are designing a generic  APIs where we do not know who would connect to the APIs to get a service. Following are some common HTTP status codes that we should return for common HTTP methods.

HTTP Verb
Applicable Status codes
GET
200-Ok, 404- Not Found,  400- Bad Request , 500- Internal Server error
POST
201- Created , 400- Bad Request , 500- Internal Server error
DELETE
204- No Content, 404- Not Found,  400- Bad Request , 500- Internal Server error
PUT
200-Ok, 404- Not Found,  400- Bad Request , 500- Internal Server error
PATCH
200-Ok, 404- Not Found,  400- Bad Request , 500- Internal Server error
General
401- Unauthorized, 403 Forbidden, 405 Method not allowed


Friday, 11 September 2015

Recieve Encrypted SMS using Android

We have discussed how we can send encrypted SMS using Android in this post. Now it is time to analyze how we can decrypt those encrypted SMS using another application. Targeted functionality is when the SMS received , it should spawn the decryption application and show the clear text message to user.

Im using an Android BroadcastReceiver class in order to keep an alert on whats going on the phone. As you know it is running as a background thread in the phone. If there is an incoming SMS it tries decrypt it. First of all lets examine whats in the all important Manifest file.
   

<?xml version="1.0" encoding="utf-8"?>
<manifest xmlns:android="http://schemas.android.com/apk/res/android"
    package="com.example.priya.recievesms_mis023" >
    <uses-permission android:name="android.permission.RECEIVE_SMS"/>
    <uses-permission android:name="android.permission.READ_SMS"/>
    <application
        android:allowBackup="true"
        android:icon="@mipmap/ic_launcher"
        android:label="@string/app_name"
        android:theme="@style/AppTheme" >
        <activity
            android:name=".MainActivity"
            android:label="@string/app_name" >
            <intent-filter>
                <action android:name="android.intent.action.MAIN" />

                <category android:name="android.intent.category.LAUNCHER" />
            </intent-filter>
        </activity>
        <receiver android:name=".PriyalBroacast">
        <intent-filter android:priority="999" >
            <action android:name="android.provider.Telephony.SMS_RECEIVED" />
        </intent-filter>
    </receiver>
    </application>

</manifest>


Permissions are granted to read and receive SMS.
<uses-permission android:name="android.permission.RECEIVE_SMS"/> <uses-permission android:name="android.permission.READ_SMS"/>
Note that I set the receiver as PriyalBroacast because this would be my Broacast listener class which inherited by BroadcastReceiver. I set up relatively higher value to priority in order to execute this operation before many other operations. action android:name="android.provider.Telephony.SMS_RECEIVED" This line would invoke the broadcast listener in the event of a SMS received.
The Broacast Class
   
public class PriyalBroacast extends BroadcastReceiver
{
    @Override
    public void onReceive(Context context, Intent intent)
    {
        try {

            Bundle smsBundle = intent.getExtras();
            SmsMessage[] msg = null;
            String sms_str = "";
            String mySms = "";
            if (smsBundle != null) {
                Object[] pdus = (Object[]) smsBundle.get("pdus");
                msg = new SmsMessage[pdus.length];

                if(msg.length>0)
                {
                    msg[0] = SmsMessage.createFromPdu((byte[]) pdus[0]);
                    mySms = msg[0].getMessageBody().toString();
                }

                AESEncrypt aes = new AESEncrypt(256);
                mySms = mySms.substring(0, mySms.length() - 1);
                byte[] b= aes.decrypt(Base64.decode(mySms, Base64.DEFAULT));
                String decryptedSMS = new String(b);


                Intent smsShow = new Intent(context, MainActivity.class);
                smsShow.setFlags(Intent.FLAG_ACTIVITY_NEW_TASK);
                smsShow.putExtra("mySms", decryptedSMS);
                context.startActivity(smsShow);


            }
        }
        catch(Exception ex)
        {
           
        }

    }
}

This class would extract the body of the SMS and decrypt it using AES. After a successful decryption, its just call to the MainActivity to show the decrypted message.
Following is the Implementation of the AES Cryptography class.
Note that Im using a static AES Key which is hard coded here. This is not a very good security practice. Instead, We need to store the key securely in the device if we are going to use the Symmetric encryption. I would discuss this in a separate post and this is enough for the time being and for learning purposes.
   
public class PriyalBroacast extends BroadcastReceiver
{
public class AESEncrypt {
    private static Key key=null;
    private static Cipher cipher = null;

    private static String algorithm = "AES";
    private static byte[] keyValue=new byte[] {'0','2','3','4','5','6','7','8','9','1','2','3','4','5','6','7'};//

    public AESEncrypt(int size) throws NoSuchAlgorithmException, NoSuchPaddingException {
        //Generate a key
        try {
            if (key == null) {
                KeyGenerator generator = KeyGenerator.getInstance("AES");
                generator.init(size);
                key = generateKey();//generator.generateKey();
            }
            if (cipher == null) cipher = Cipher.getInstance("AES/ECB/PKCS5Padding");
        }
        catch(Exception e)
        {}
    }

    public byte[] encrypt(String msg) throws InvalidKeyException,
            IllegalBlockSizeException, BadPaddingException{
        // encryption pass
        cipher.init(Cipher.ENCRYPT_MODE, key);
        return cipher.doFinal(msg.getBytes());
    }

    public byte[] decrypt(byte[] cipherText) throws InvalidKeyException,
            IllegalBlockSizeException, BadPaddingException{
        // decryption pass
        cipher.init(Cipher.DECRYPT_MODE, key);
        return cipher.doFinal(cipherText);
    }

    private static Key generateKey() throws Exception
    {
        Key key = new SecretKeySpec(keyValue, algorithm);
        return key;
    }
}

Finally the Main Activity class and the simple UI.
   
public class MainActivity extends AppCompatActivity {

    @Override
    protected void onCreate(Bundle savedInstanceState) {
        super.onCreate(savedInstanceState);
        setContentView(R.layout.activity_main);

        Intent sms_intent=getIntent();
        Bundle b=sms_intent.getExtras();
        TextView tv=(TextView)findViewById(R.id.txtview);
        if(b!=null){

            tv.setText(b.getString("mySms"));
        }

    }
    @Override
    public boolean onCreateOptionsMenu(Menu menu) {
        // Inflate the menu; this adds items to the action bar if it is present.
        getMenuInflater().inflate(R.menu.menu_main, menu);
        return true;
    }

    @Override
    public boolean onOptionsItemSelected(MenuItem item) {
        // Handle action bar item clicks here. The action bar will
        // automatically handle clicks on the Home/Up button, so long
        // as you specify a parent activity in AndroidManifest.xml.
        int id = item.getItemId();

        //noinspection SimplifiableIfStatement
        if (id == R.id.action_settings) {
            return true;
        }

        return super.onOptionsItemSelected(item);
    }
}

Following UI would show the decrypted SMS
   
<RelativeLayout xmlns:android="http://schemas.android.com/apk/res/android"
    xmlns:tools="http://schemas.android.com/tools"
    android:layout_width="match_parent"
    android:layout_height="match_parent"

    tools:context="com.example.smsreceiver.MainActivity" >

    <TextView
        android:id="@+id/txtview"
        android:layout_width="wrap_content"
        android:layout_height="wrap_content"
        android:maxLines="5"
        android:singleLine="false"
        android:textSize="20sp"
        />
</RelativeLayout>


If we examine the SMS Inbox in the emulator. We can clearly see the encrypted messages.

You can Download the source code from this location. 

Send Encrypted SMS using Android

You may need to send a secure SMS to your friend over the GSM network. Following is a Tutorial of how you can build Secure SMS messenger using Android.

You can find the How we can receive these secure SMS from this link.

First and foremost, we need to configure the Manifest file with correct permissions.
   
<manifest xmlns:android="http://schemas.android.com/apk/res/android"
    package="com.example.priya.sendsms_mis023" >

    <uses-sdk
        android:minSdkVersion="8"
        android:targetSdkVersion="23"/>
    <uses-permission
        android:name="android.permission.SEND_SMS" />
    <application
        android:allowBackup="true"
        android:icon="@mipmap/ic_launcher"
        android:label="@string/app_name"
        android:theme="@style/AppTheme" >

        <activity
            android:name=".MainActivity"
            android:label="@string/app_name" >
            <intent-filter>
                <action android:name="android.intent.action.MAIN" />

                <category android:name="android.intent.category.LAUNCHER" />
            </intent-filter>
        </activity>
    </application>

</manifest>


The most important part is acquire correct permission using
android:name="android.permission.SEND_SMS"

Next, we will take a look at the UI(View) part of the application. It is very simple and all you need to do is add couple of Edit text views and a button to send the encrypted SMS.
 
<RelativeLayout xmlns:android="http://schemas.android.com/apk/res/android"
    xmlns:tools="http://schemas.android.com/tools" android:layout_width="match_parent"
    android:layout_height="match_parent" android:paddingLeft="@dimen/activity_horizontal_margin"
    android:paddingRight="@dimen/activity_horizontal_margin"
    android:paddingTop="@dimen/activity_vertical_margin"
    android:paddingBottom="@dimen/activity_vertical_margin" tools:context=".MainActivity">

    <TextView android:text="Enter Message" android:layout_width="wrap_content"
        android:layout_height="wrap_content"
        android:id="@+id/textView" />

    <EditText
        android:layout_width="wrap_content"
        android:layout_height="wrap_content"
        android:id="@+id/editText"
        android:layout_below="@+id/textView"
        android:layout_alignParentLeft="true"
        android:layout_alignParentStart="true" />

    <TextView android:text="Enter Phone Number" android:layout_width="wrap_content"
        android:layout_height="wrap_content"
        android:layout_below="@+id/editText"
        android:id="@+id/textView2" />


    <EditText
        android:layout_width="wrap_content"
        android:layout_height="wrap_content"
        android:id="@+id/editTextNumber"
        android:layout_alignParentLeft="true"
        android:layout_below="@+id/textView2"
        android:layout_alignParentStart="true" />

    <Button
        android:layout_width="wrap_content"
        android:layout_height="wrap_content"
        android:text="Send"
        android:id="@+id/button"
        android:layout_below="@+id/editTextNumber"
        android:layout_alignParentLeft="true"
        android:layout_alignParentStart="true" />


</RelativeLayout>


Next , we will take a look at how we can do the Encryption part. So I came up with a separate class for this using AES.
public class AESEncrypt {
    private static Key key=null;
    private static Cipher cipher = null;

    private static String algorithm = "AES";
    private static byte[] keyValue=new byte[] {'0','2','3','4','5','6','7','8','9','1','2','3','4','5','6','7'};//

    public AESEncrypt(int size) throws NoSuchAlgorithmException, NoSuchPaddingException {
        //Generate a key
        try {
            if (key == null) {

                key = generateKey();
            }
            if (cipher == null) cipher = Cipher.getInstance("AES/ECB/PKCS5Padding");
        }
        catch(Exception e)
        {}
    }

    public byte[] encrypt(String msg) throws InvalidKeyException,
            IllegalBlockSizeException, BadPaddingException{
        // encryption pass
        cipher.init(Cipher.ENCRYPT_MODE, key);
        return cipher.doFinal(msg.getBytes());
    }

    public byte[] decrypt(byte[] cipherText) throws InvalidKeyException,
            IllegalBlockSizeException, BadPaddingException{
        // decryption pass
        cipher.init(Cipher.DECRYPT_MODE, key);
        return cipher.doFinal(cipherText);
    }

    private static Key generateKey() throws Exception
    {
        Key key = new SecretKeySpec(keyValue, algorithm);
        return key;
    }
}


Note that Im using a static AES Key which is hard coded here. This is not a very good security practice. Instead, We need to store the key securely in the device if we are going to use the Symmetric encryption. I would discuss this in a separate post and this is enough for the time being and for learning purposes.
encrypt and decrypt methods in this class itself in order perform all cryptography operations.
The generateKey() function would generate the reuired key based on the initial keyValue and the encryption algorithm which AES in this instance.

Finally, lets examine the main Activity class.
public class MainActivity extends AppCompatActivity {

    @Override
    protected void onCreate(Bundle savedInstanceState) {
        super.onCreate(savedInstanceState);
        setContentView(R.layout.activity_main);

        final Button button = (Button) findViewById(R.id.button);
        final EditText tvMessage=(EditText)findViewById(R.id.editText);
        final EditText tvNumber=(EditText)findViewById(R.id.editTextNumber);
        final String SENT = "SMS_SENT";
        final String DELIVERED = "SMS_DELIVERED";

        final PendingIntent sentPI = PendingIntent.getBroadcast(this, 0,
                new Intent(SENT), 0);

        final PendingIntent deliveredPI = PendingIntent.getBroadcast(this, 0,
                new Intent(DELIVERED), 0);


        registerReceiver(new BroadcastReceiver(){
            @Override
            public void onReceive(Context arg0, Intent arg1) {
                switch (getResultCode())
                {
                    case Activity.RESULT_OK:
                        Toast.makeText(getBaseContext(), "SMS sent",
                                Toast.LENGTH_SHORT).show();
                        break;
                    case SmsManager.RESULT_ERROR_GENERIC_FAILURE:
                        Toast.makeText(getBaseContext(), "Generic failure",
                                Toast.LENGTH_SHORT).show();
                        break;
                    case SmsManager.RESULT_ERROR_NO_SERVICE:
                        Toast.makeText(getBaseContext(), "No service",
                                Toast.LENGTH_SHORT).show();
                        break;
                    case SmsManager.RESULT_ERROR_NULL_PDU:
                        Toast.makeText(getBaseContext(), "Null PDU",
                                Toast.LENGTH_SHORT).show();
                        break;
                    case SmsManager.RESULT_ERROR_RADIO_OFF:
                        Toast.makeText(getBaseContext(), "Radio off",
                                Toast.LENGTH_SHORT).show();
                        break;
                }
            }
        }, new IntentFilter(SENT));


        registerReceiver(new BroadcastReceiver(){
            @Override
            public void onReceive(Context arg0, Intent arg1) {
                switch (getResultCode())
                {
                    case Activity.RESULT_OK:
                        Toast.makeText(getBaseContext(), "SMS delivered",
                                Toast.LENGTH_SHORT).show();
                        break;
                    case Activity.RESULT_CANCELED:
                        Toast.makeText(getBaseContext(), "SMS not delivered",
                                Toast.LENGTH_SHORT).show();
                        break;
                }
            }
        }, new IntentFilter(DELIVERED));

        button.setOnClickListener(new View.OnClickListener() {
            public void onClick(View v) {

                try {
                    String msg = tvMessage.getText().toString();
                    String phoneNumber = tvNumber.getText().toString();
                    AESEncrypt aes = new AESEncrypt(256);
                    String base64 = Base64.encodeToString(aes.encrypt(msg), Base64.DEFAULT);
                    SmsManager smsManager = SmsManager.getDefault();
                    smsManager.sendTextMessage(phoneNumber, null, base64, sentPI, deliveredPI);

                }
                catch(Exception ex)
                {}
            }
        });


    }

    @Override
    public boolean onCreateOptionsMenu(Menu menu) {
        // Inflate the menu; this adds items to the action bar if it is present.
        getMenuInflater().inflate(R.menu.menu_main, menu);
        return true;
    }

    @Override
    public boolean onOptionsItemSelected(MenuItem item) {
        // Handle action bar item clicks here. The action bar will
        // automatically handle clicks on the Home/Up button, so long
        // as you specify a parent activity in AndroidManifest.xml.
        int id = item.getItemId();

        //noinspection SimplifiableIfStatement
        if (id == R.id.action_settings) {
            return true;
        }

        return super.onOptionsItemSelected(item);
    }
}


I used the smsManager class to send the Message across the network. This is the simplest SMS sender in Android. There are two BroadcastReceivers where it can track what is actually happens to the SMS ending process once user clicks the send button.

Following is the Final Screenshot of the application.


Note : If you are sending the SMS to another emulator running on your desktop, you need to specify the port number of that emulator as the phone number. To get a specific port number for the emulator use Android Device Monitor tool.

You can Download the source code from this location.

Monday, 24 August 2015

.Net Data Annotations : Add composite Primary Key Code First

Following is the way we can add composite primary key for an entity using Data Annotations.

    
        [Key, Column(Order = 0)]
        [Display(Name = "Year")]
        [Range(2015, 2050)]
        public int Year { get; set; }

        [Key, Column(Order = 1)]
        [Range(1, 12)]
        [Display(Name = "Month")]
        public int Month { get; set; } 


Friday, 21 August 2015

REST Architecture : Scrammed explanation

If you want to take a glance @ Rest architecture , following is a brief definition with constraints.

Rest is an Architectural design pattern and not a standard or design methodology.

Roy Fielding is the person who defines REST as follows (~70's)
"Representational State Transfer is intended to evoke an image of how a well-designed Web application behaves: a network of web pages (a virtual state-machine), where the user progresses through an application by selecting links (state transitions), resulting in the next page (representing the next state of the application) being transferred to the user and rendered for their use."

Simply , a web page represent a state and by clicking a hyperlink you can do the state transfer into a different page.

Following are the Architectural Constraints of REST.

  1. Uniform Interface : Each call is Independent
  2. Statelessness : State is never managed in the server. 
  3. Client-Server : Highly decoupled
  4. Cacheable : Each response must define itself as cacheable or not
  5. Layered System : Client is not sure about the direct connection to the server   
  6. Code on Demand : Server can customize the client functionality without re-writing 
HATEOAS is a terminology that goes with REST. following is the acronym. 

"Hypermedia as the Engine of Application State"

Hypermedia  is a generalization of hypertext along with other media types. This also describes that the API is Self-documenting, very dynamic . ie : Allows changes to API without having to rewrite the client. 

Thursday, 20 August 2015

Identify DB Entity exceptions

When the app throws an entity exception, it would give a generic details about the error. By using following exception handling block , we would be able to find particular exception in-detail.

    
   catch (DbEntityValidationException Ex)
            {
                foreach (var errors in Ex.EntityValidationErrors)
                {
                    foreach (var validationError in errors.ValidationErrors)
                    {
                        Trace.TraceInformation("Property: {0} Error: {1}",
                                                validationError.PropertyName,
                                                validationError.ErrorMessage);
                    }
                }
            }


Add validation error to MVC Controller and display the error in View

Following code would add error to the model based on some logic in the Controller.
In the Controller
    
   if ((leaveSummary.AnnualTaken + numOfDays) > leaveSummary.Annual)
       ModelState.AddModelError("Leave", "Annual Leave exhausted !");
   else
       leaveSummary.AnnualTaken = leaveSummary.AnnualTaken + numOfDays;

AddModelError is the method we are using to add the new error.
To display this view in the model we need to do following in the cshtml
    
        
@if (!ViewData.ModelState.IsValid) { @ViewData.ModelState["Leave"].Errors[0].ErrorMessage }

Custom compare Validate in the MVC model

We can use data annotations for the model level validations for most scenarios.  There are situations where we need to go beyond than data annotation validations and following is a data comparison example where we need to use extensive validations.

In this example we are using IValidatableObject in our model class in order to implement the date compare validation.

    
   public class LeaveApply : IValidatableObject
    {
        [Key]
        [HiddenInput(DisplayValue = false)]
        public int LeaveKey { get; set; }

        [Display(Name = "Employee")]
        public int EmployeeId { get; set; }

        [ForeignKey("EmployeeId")]
        public Employee Employee { get; set; }
      

        [Display(Name = "Date From")]
        [DisplayFormat(DataFormatString = "{0:dd/MM/yyyy}", ApplyFormatInEditMode = true)]
        public DateTime DateFrom  { get; set; }

        [Display(Name = "Date To")]
        [DisplayFormat(DataFormatString = "{0:dd/MM/yyyy}", ApplyFormatInEditMode = true)]
        public DateTime DateTo { get; set; }


        public IEnumerable< ValidationResult>  Validate(ValidationContext validationContext)
        {
            if (DateTo < DateFrom)
            {
                yield return new ValidationResult("Date To must be greater than Date From");
            }
        }
    }

Monday, 20 July 2015

Allow Datetime null in scaffolding model

When you are trying to do scaffolding with a model which has datetime filed , the common code is as follows.
    
        [Display(Name = "End Date")]
        [DisplayFormat(DataFormatString = "{0:dd/MM/yyyy}")]
        public DateTime EndDate { get; set; }


But this makes this filed mandatory by default. So in-order to make it nullable , we need to alter the code as following.
    
        [Display(Name = "End Date")]
        [DisplayFormat(DataFormatString = "{0:dd/MM/yyyy}")]
        Public Nullable<DateTime>  EndDate { get; set; }


Thursday, 16 July 2015

Add Migrations to existing code first Model

Following steps guides you how to generate migration code for the existing code first dbContext model.

1. Create your model class
 public class NewsSlider
    {
        [Key]
        [HiddenInput(DisplayValue = false)]
        public int NewsSliderId { get; set; }

        [Display(Name = "News Item")]
        [StringLength(500)]
        public string NewsItem { get; set; }
    }


2. Update your dbContext class as follows
 
   public System.Data.Entity.DbSet<myapp .models.newsslider=""> NewsSliders { get; set; }

3. Execute Add-Migration NewsSlider in the Package Manager console

4. This would generate the migration code using scaffolding.
  public partial class NewsSlider : DbMigration
    {
        public override void Up()
        {
            CreateTable(
                "dbo.NewsSliders",
                c => new
                    {
                        NewsSliderId = c.Int(nullable: false, identity: true),
                        NewsItem = c.String(maxLength: 500),
                    })
                .PrimaryKey(t => t.NewsSliderId);
            
        }
        
        public override void Down()
        {
            DropTable("dbo.NewsSliders");
        }
    }

Thursday, 9 July 2015

Avoiding pluralization in the Data Context class

When we are designing the Data Access as code first, the Data Context is looking for pluralized tables in the DB.

Eg :

public DbSet<Student> StudentSet{ get; set; } 

This is looking for the table Students in the database.

If we want to use the same table name, we need to remove the PluralizingTableNameConvention attribute from the lmodelBuilder. The full example is as follows

 public class SchoolContext : DbContext
    {
        public SchoolContext ()
            : base("name=SchoolCon")
        {
            Database.SetInitializer<SchoolContext>(null);
        }

        public DbSet<Student> StudentSet { get; set; }


        protected override void OnModelCreating(DbModelBuilder modelBuilder)
        {
            modelBuilder.Conventions.Remove<PluralizingTableNameConvention>();

            modelBuilder.Entity<Student>().HasKey<int<(e => e.StudentId);
        }
    }


Wednesday, 8 July 2015

Using FluentValidation in .Net Projects

FluentValidation is a very easy to use simple validation framework which we can use in .Net projects. This is been developed by Jeremy Skinner. It uses  fluent interface and lambda expressions for building validation rules for your business objects.
Following is a simple example of how to use this validation framework in a simple class. 
 class StudentValidator : AbstractValidator
        {
            public StudentValidator ()
            {
                RuleFor(obj => obj.Id).NotEmpty();
                RuleFor(obj => obj.Name).NotEmpty();
                RuleFor(obj => obj.Age).GreaterThan(5).LessThanOrEqualTo(20);
            }
        }

        protected override IValidator GetValidator()
        {
            return new StudentValidator ();
        }

AbstractValidator is fluent class which accepts the class that needs to be validated.


Friday, 3 July 2015

Match data contract namespaces in two entities

When we need to do any data contract mapping between two layers or entities ( eg : client and server sides ) the name spaces should match. Otherwise the mismatch error would occur when we tying to do the data contact mapping in between two layers or entities.

Following are the two example data contract classes that resides in two layers.

The Business Entity data contract class

namespace TestApp.Business.Entities
{
    [DataContract]
    public class Student : EntityBase, IIdentifiableEntity
    {
        [DataMember]
        public int StudentId { get; set; }

        [DataMember]
        public string Name { get; set; }

        [DataMember]
        public int Age{ get; set; }
   }
}
The Business Client entity data contract class
namespace TestApp.Client.Entities
{
    [DataContract]
    public class Student : EntityBase, IIdentifiableEntity
    {
        [DataMember]
        public int StudentId { get; set; }

        [DataMember]
        public string Name { get; set; }

        [DataMember]
        public int Age{ get; set; }
   }
}


This would give the m=contract mismatch error because the name spaces are different. The simplest solution for this is having the namespace tag in the contract attribute.
namespace TestApp.Business.Entities
{
     [DataContract(Namespace = "http://www.priyaltech.com/appname/servicename")]
    public class Student : EntityBase, IIdentifiableEntity
    {
        [DataMember]
        public int StudentId { get; set; }

        [DataMember]
        public string Name { get; set; }

        [DataMember]
        public int Age{ get; set; }
   }
}

namespace TestApp.Client.Entities
{
    [DataContract(Namespace = "http://www.priyaltech.com/appname/servicename")]
    public class Student : EntityBase, IIdentifiableEntity
    {
        [DataMember]
        public int StudentId { get; set; }

        [DataMember]
        public string Name { get; set; }

        [DataMember]
        public int Age{ get; set; }
   }
}

But most of the time in the client side, we tend to not to have simple public attributes with data contracts. This is mainly due to the validation and and other client side processing we need to do. Typical client side data entity class would looks like following.
namespace CarRental.Client.Entities
{
    public class Student: ObjectBase
    {
        int _StudentId;
        string _Name ; 
        int _Age;

        public int StudentId
        {
            get { return _StudentId; }
            set
            {
                if (_StudentId != value)
                {
                    _StudentId = value;
                    OnPropertyChanged(() => StudentId);
                }
            }
        }

        public string Name
        {
            get { return _Name; }
            set
            {
                if (_Name != value)
                {
                    _Name = value;
                    OnPropertyChanged(() => Name);
                }
            }
        }

      public int Age
        {
            get { return _Age; }
            set
            {
                if (_Age != value)
                {
                    _Age = value;
                    OnPropertyChanged(() => Age);
                }
            }
        }
   }
}

As you can see, we do not have the DataContract and DataMember attributes in this client class. So how we can do the contract mapping. The best way is to use the AssemblyInfo class of the project and do the data contract mapping there as follows.
[assembly: ContractNamespace("http://www.priyaltech.com/appname/servicename",
                              ClrNamespace = "TestApp.Business.Entities")]
Do the same to the client project's AssemblyInfo class as well.
[assembly: ContractNamespace("http://www.priyaltech.com/appname/servicename",
                              ClrNamespace = "TestApp.Client.Entities")]


Wednesday, 22 April 2015

Generic Repository to do transactions with Azure Document DB

Following is a generic repository we can use in order to do data manipulations in Azure document DB. This can be used to save and retrieve POCO objects and generic streamed objects in Azure Document DB.

I have used MEF to do the dependency injections. This repository is used only to deal with one collection. More generic implementation is on its way and will update soon.

 public interface IDocumentDb
        {
            dynamic GetRecord(string id);

            IEnumerable<object> GetRecords();
            
             Task Add(object entity);

            Task Update(object entity,string id);

            Task Delete(string id);

            void Dispose();
        }
The implementation class is as follows.
   [Export(typeof(IDocumentDb))]
    [PartCreationPolicy(CreationPolicy.NonShared)]
   public class DocumentDb : IDocumentDb
    {
        private static DocumentClient _client;
        private Database _database;
        private DocumentCollection _collection;

        private static readonly string DadatabaseId = ConfigurationManager.AppSettings["DatabaseId"];


        private static readonly string EndpointUrl = ConfigurationManager.AppSettings["EndPointUrl"];
        private static readonly string AuthorizationKey = ConfigurationManager.AppSettings["AuthorizationKey"];
        private static readonly string CollectionId = ConfigurationManager.AppSettings["CollectionId"];

    
        public DocumentDb()
        {
            
           Init();
        }

        private async Task Init()
        {
            _client = new DocumentClient(new Uri(EndpointUrl), AuthorizationKey);
            try
            {
                this._database = _client.CreateDatabaseQuery().Where(db => db.Id == DadatabaseId).ToArray().FirstOrDefault();
                if (_database == null)
                {
                    this._database = await _client.CreateDatabaseAsync(new Database { Id = DadatabaseId });
                }

                this._collection = _client.CreateDocumentCollectionQuery(_database.SelfLink).Where(c => c.Id == CollectionId).ToArray().FirstOrDefault();
                if (_collection == null)
                {
                    _collection = await _client.CreateDocumentCollectionAsync(_database.SelfLink, new DocumentCollection { Id = CollectionId });
                }
            }
            catch (Exception ex)
            {
                
                throw;
            }


        }

        public async Task Add(object entity)
        {
            try
            {
                await _client.CreateDocumentAsync(_collection.SelfLink, entity);
            }
            catch (Exception ex)
            {
                
                throw;
            }
        }

        public async Task Update(object entity,string id)
        {
            try
            {
                var doc =
                   _client.CreateDocumentQuery(_collection.SelfLink).Where(d => d.Id == id).AsEnumerable().FirstOrDefault();

                if (doc != null)
                    await _client.ReplaceDocumentAsync(doc.SelfLink, entity);

            }
            catch (Exception ex)
            {
                
                throw;
            }
        }

        public dynamic GetRecord(string id)
        {
            try
            {
                dynamic doc =
                    _client.CreateDocumentQuery(_collection.SelfLink).Where(d => d.Id == id).AsEnumerable().FirstOrDefault();
                return doc;
            }
            catch (Exception ex)
            {
                throw;
            }
           
        }

        public IEnumerable<object> GetRecords()
        {
            try
            {
                var obj = _client.CreateDocumentQuery(_collection.SelfLink, "SELECT * FROM " + CollectionId).AsEnumerable().ToList();
                return obj;
            }
            catch (Exception ex)
            {
                throw;
            }
        }


        public async Task  Delete(string id)
        {
            try
            {

                var doc =
                    _client.CreateDocumentQuery(_collection.SelfLink)
                        .Where(d => d.Id == id)
                        .AsEnumerable()
                        .FirstOrDefault();

                if (doc != null)
                {
                    var resourceResponse = await _client.DeleteDocumentAsync(doc.SelfLink);
                }
            }
            catch (Exception ex)
            {
                throw;
            }
        }

        public void Dispose()
        {
            if (_client == null)
            {
                return;
            }

           _client.Dispose();
        }

    }
Following is the consumer class.
public class Consumer
{
      [Import(typeof(IDocumentDb))]
      public IDocumentDb DocumentDb { get; set; }

      public Consumer()
      {
      }

      public void TempAdd()
      {
                  DocDbCustomFieldViewModel docDbEntity = new DocDbCustomFieldViewModel();
                  docDbEntity.Id = model.ID;
                  docDbEntity.ClientId = CurrentClientID;
                  docDbEntity.ProjectId = CurrentProjectID;

                List lCusFields = new List();
                foreach (var cusField in cusFields)
                {
                    CustomFieldViewModel newCusField = CustomFieldProvider.Get(cusField.CustomFieldID);
                    CustomFieldViewViewModel tmpModel = new CustomFieldViewViewModel();
                    tmpModel.DisplayName = newCusField.DisplayName;
                    tmpModel.FieldName = newCusField.FieldName;
                    tmpModel.Value = string.Empty;
                    lCusFields.Add(tmpModel);

                }
                docDbEntity.CustomFields = lCusFields;     

                 DocumentDb.Add(docDbEntity);
       }

       public void TempSearch(string id)

}